Quiz: How Do You Handle Aircraft Radio Communication Problems?

John Peltier

You’re ten miles away from your home airport, inbound for landing, and you switch over to the AWOS for a weather check. Nothing. Must not be working. You get closer to the airport and dial up the control tower to inform them of your intentions. No response. After some troubleshooting, you determine that your radio is dead. What do you do? When was the last time you really walked yourself through different aircraft radio communication problems, or “chair-flew” it, as they say?

Aircraft Radio Communication Problem – Uncontrolled Airport

The Scenario:

You just took your parents for their first flight since you got your license. You’re ten miles north of the airport, day VFR, setting yourself up for a straight-in to runway 18 at an uncontrolled airport. You haven’t heard anyone on CTAF even though you can see planes in the pattern, and after checking other frequencies you’ve come to the conclusion that your radio is inoperative. What are you going to do?

Walk yourself through the procedures now.

The Answer:

  • It’s a good habit to set your transponder to 7600 whenever you realize you have a radio malfunction, even if you’re not in controlled airspace. Build those habit patterns!
  • Stay clear of all traffic until you determine which runway everyone is landing on, and which direction traffic is in. If you fly at this airport routinely, it probably hasn’t changed. If you were setting yourself up for the straight-in, stay clear by holding your altitude (at least 500’ higher than the traffic pattern) and offset the runway laterally so that you can make a big circle around and figure out which aircraft are where.
  • When you determine that it’s safe to enter the traffic pattern, do so and stay predictable. Fly the same direction and speed as you normally do so, and don’t forget your landing checks.
  • Continue to key the microphone and announce your position just in case it starts working again.
  • After landing, clear the runway immediately. Survey the taxiways between you and your destination and taxi when it’s clear.
Aircraft Radio Communication Problem – Class D Airspace

The Scenario:

You’re returning home from a weekend at a cabin in the mountains. The time is 2030 local time and the skies are clear. Your home airport is in Class D airspace; the control tower stays open until 2200. You’re ten miles east of the airport, just wrote down the ATIS information, and switched over to tower frequency. ATIS says winds are out of the north and landing traffic is using runway 34. The tower isn’t answering any of your radio calls but they’re talking with other traffic; when you transmit, you can’t hear sidetones (clicks) in your headset like you normally do. No one is answering your radio checks and you realize your transmitter is broken.

What are you going to do?

The Answer:

  • As in the previous example, set your transponder to 7600.
  • You must stay clear of the Class D airspace boundaries until you determine the flow of traffic. This can be done horizontally or vertically, and at night, it may be easier to get a picture of the traffic by looking down on it from above.
  • Enter the traffic pattern when safe to do so – entering on the upwind gives you maximum time to prepare yourself.
  • From here, just fly your normal night traffic pattern and continue to key the microphone with your position just in case your radio starts working again.
  • Tower won’t know you have an operable receiver so they’ll give you light gun signals (they may also transmit your clearances in the blind, but they don’t on this night).
    • Which color are you looking for?
    • What if tower gives you a steady red light, what do you do?
    • How do you acknowledge these signals at night?
  • A solid green light means you’re cleared to land, and you may only land after receiving this signal. Acknowledge this signal at night by flashing your landing light. A steady red light means you must give way to other aircraft in the pattern. Continue to circle and wait for a steady green light.
  • After landing, continue to look for light signals – you’re looking for either a flashing red (taxi clear of runway) and or flashing green (cleared to taxi). The tower will most likely freeze ground traffic until they determine where you’re headed.
Aircraft Radio Communication Problem – Class B Airspace

The Scenario:

It’s a beautiful day and you’re returning to land at a Class D airport underneath San Francisco’s Class B shelf. You notice smoke coming from your radio so you immediately turn it off; the smoke goes away and you elect to keep your master battery and alternator on for the meantime. You’re 15 miles away at 3,000’ AGL, and it’s your closest runway.

What are you going to do?

The Answer:

  • Change your transponder. Here, you could set either 7600 or 7700. This is an age-old debate amongst instructors. Some say that in this case you can just set 7600 to indicate you’re NORDO. Other instructors will say that if you did any emergency checklist actions (like turning off a smoking radio), then you set 7700. In this case, that might be a good idea, in case the fire is smoldering at least fire trucks will be waiting for you on the ground. And this could always develop into something worse. No one will fault you for setting 7700.
  • Remain clear of the Class B airspace if you can (by going underneath). This is how most VFR pilots will operate anyways. If you can’t, ATC will see your transponder and keep other traffic clear of you – that’s their job in Class B airspace.
  • From here, it’s the same basic procedures as the previous Class D example. Stay clear until you determine traffic flow, enter the pattern, and look for light gun signals from the control tower. The fact that you might be in Class B is irrelevant at this point. How do you acknowledge a light gun signal during the daytime?
    • Acknowledge by rocking your wings.
Troubleshooting Aircraft Radios

Any number of things can cause a transmitter failure, a receiver failure, or both.

Indicators that your radio may be malfunctioning:

  • Lack of sidetones (clicks/feedback) in your headset when you transmit (at least a transmitter failure).
  • Not hearing any transmissions on automated frequencies like AWOS & ATIS (at least a receiver failure).
  • No answers to “radio checks” you transmit (could be a transmitter or receiver failure).
  • And, of course, the thing won’t turn on.

Steps to troubleshoot a radio in the air:

  • Start with the most basic things first, and that’s usually cycling the power on the radio unit itself.
  • Check the volume knob – did it somehow get turned all the way down? Do you hear any static when you turn it up? If not, you probably have at least a receiver failure.
  • Toggle the squelch settings – again, are you hearing any static when you do this?
  • Check your headset cord – is it still plugged in? Does your headset have a volume knob as well?
  • If your circuit breakers are accessible (and most are) check that it’s still in. If it’s popped, reset it. If it pops again, there’s probably a really good reason it’s popping and you should leave it off.
  • Don’t become so engrossed in troubleshooting your radio that you forget to fly your aircraft!

Remember at all times that you must maintain basic VFR weather minimums and visual contact with the control tower, if there is one. Further references can be found in the FARs parts 91.125-131, and in the AIM Chapters 4-2-13 & 4-3-13.

Get Started With Your Flight Training Today

You can get started today by filling out our online application. If you would like more information, you can call us at (844) 435-9338, or click here to start a live chat with us.

Additional Quizzes:

Do You Know These Five Aviation Acronyms?

How Much Do You Know About Aircraft Icing?

Additional Resources:

Understanding How Airspace Works – AOPA

FAR Part 91 – FAA

Aeronautical Information Manual – FAA

Know the Signs and Symptoms of Hypoxia and Avoid Becoming a Victim

Margie O’Connor

Whether just learning to fly or a seasoned aviator, hypoxia does NOT discriminate. It doesn’t care if you have 15 hours of flight time and you’re still aspiring to get your Private Pilot’s License or if you’re a seasoned aviator with 12,000+ hours flying for a major airline.  Hypoxia lurks just around the corner, threatening to end your flight (and life) should you fail to recognize the symptoms and respond accordingly.

What Causes Hypoxia?

When the atmosphere we fly in restricts or prevents the efficient transfer of oxygen to our lungs, we are susceptible to hypoxia. Often potentially fatal, the symptoms of hypoxia can slowly creep in so subtlely, even the most discerning pilot may not recognize the onset.

Oxygen (O2) fills roughly 21% of the atmosphere and this percentage doesn’t really change with altitude (the number of O2 molecules decreases with altitude). What does change significantly as you fly higher is the partial pressure of that O2. At Sea Level (SL), your body operates comfortably with a partial pressure of 760mm Hg or 29.92 in Hg. But as begin your ascent, this decreases rapidly with the greatest pressure differential occurring from SL to 5,000 feet. As the partial pressure decreases, the oxygen molecules lose their ability to attach to your hemoglobin (the responsible party for moving O2 through your body). Do you see where this is going? If you guessed an inability to breathe, you are correct. And of course, when we can’t breathe, we eventually lose consciousness and well, you know the end of that flight.

But doesn’t hypoxia always occur at high altitudes? Unfortunately, no. The different types of hypoxia are not only dependent on circumstances (high altitudes being one of them) but also the condition of the pilot. Yes, that’s right, once again, hypoxia does not care if you are a VIP (Very Important Pilot). You may be more susceptible solely because of your particular body chemistry!

Oxygen masks being deployed in an airliner

Photo by Miikka H

You may also think hypoxia only happens in the world of commercial flight. After all, they routinely fly at high altitudes whereas your General Aviation (GA) counterpart tends to stay closer to the terra firma. This too is a potentially dangerous assumption. General aviation has had its share of accidents directly attributable to hypoxia. An accident from 2001 involving a pilot, who climbed to 21,600’ in his non-pressurized airplane without supplemental oxygen, is just one tragic example of a hypoxia-induced crash.

And of course, most are familiar with the loss of pressurization and subsequent crash of the aircraft carrying famous golfer Payne Stewart in 1999. Hypoxia led to the unconsciousness of all on board and their tragic ending. Hypoxia was alive and well in the fatal crash of Helios Flight 522 in 2005 when the crew failed to recognize the lack of pressurization. All 121 persons on board perished as the B737 succumbed to fuel starvation and crashed into the side of a hill.

How do you avoid falling prey to hypoxia? Awareness and recognition of the symptoms of hypoxia are key to avoiding, or, at least being able to respond correctly to the situation.

Stages and Symptoms of Hypoxia

ICDC (which is like ACDC, the band from the 80s) is the acronym I use to remember the stages of hypoxia. The main takeaway here is to be cognizant of your altitude (take a peek at your altimeter) and try to monitor how you feel as you fly. Symptoms indicated below in italics are by no means all-inclusive.

The Indifferent stage starts at the surface and goes to an altitude of 10,000 feet. Degraded night vision is the first indicator of hypoxia, occurring at this level. Why is this, you ask? Well for starters, the eye demands more oxygen than any other organ in the body (yes, really!). And this combined with the lack of color visual acuity because your cones have gone to bed, can create somewhat of a blind situation.

As oxygen saturation continues to decrease between 10,000 and 15,000 feet, you enter the Compensatory stage of hypoxia. Impaired judgment and coordination may occur along with drowsiness, not attributable to boredom. Prolonged exposure at this level may go unnoticed if the crew is busy with other tasks.

Once you pass 15,000 feet and up to 20,000 feet, coordination, speech and flight skills rapidly deteriorate. This is the Disturbance stage. Fatigue, dizziness, and headache surface as your body can no longer compensate for the reduction in oxygen. You may feel a sense of euphoria. Although this sounds like a pleasurable state of being, if you feel euphoric (i.e., like you have suddenly become the happiest and best pilot around and nothing can stop you), you may want to check your pulse oximeter (if you have one) and immediately descend to a lower altitude (if available) because you’re approaching the point of no return.

If you continue ascending without recognizing your symptoms and donning an oxygen mask, you will undoubtedly enter the Critical stage, roughly 3-5 minutes at Flight Level (FL) 200 and above. Your central nervous system begins to die, circulation fails and your heart spools down. Convulsions and unconsciousness are preceded closely by death.

Types of Hypoxia

Hypoxic hypoxia is probably more of a concern to you as a pilot than the other types but all can produce the same debilitating or fatal results. Hypobaric hypoxia (also called Altitude hypoxia) occurs when the partial pressure decreases so much your body can no longer diffuse oxygen and in a nutshell, your body loses the capacity to breathe. So why didn’t you experience symptoms of hypoxia on your recent commercial flight to Florida or some other sunshine-laden state? Because the aircraft was pressurized, which compensates for the lack of partial pressure.

Stagnant hypoxia occurs when circulation of the blood is somehow restricted. Heart conditions, excessive G forces or extremely cold temperatures, all may impede blood flow and decrease it to the point it can no longer deliver O2 to your cells and tissues.

Smoke? Step right up – you may be the perfect candidate for hypemic hypoxia (also called anemic hypoxia), a condition caused by the hemoglobin’s inability to grab onto oxygen molecules. Certain anemic conditions, such as blood loss or non-functioning red blood cells, reduce the hemoglobin’s ability to latch on to oxygen. Or if you do happen to partake in smoking, then you’ve increased your odds dramatically for hypemic hypoxia. Why? Because given the choice between an oxygen molecule and a carbon monoxide molecule, hemoglobin will pick the latter every time.

Suppose you decided to partake in some alcoholic beverages the night prior to flying (of course, you would have quit drinking at least 8 hours prior to comply with the FAR 91.17). After leveling off at an altitude of 4,500 feet, you begin to notice a change in your vision and possibly some discrepancies with your flying abilities. You may have just entered the world of histotoxic hypoxia. This form occurs when your cells fail to process oxygen because of a toxin in the receiving cells (in this case, the toxin being alcohol). Other substances, like narcotics, can also hinder your cells’ ability to absorb oxygen but if you fall into this category, you shouldn’t be flying in the first place.

So how long do you have before incapacitation? Well that all depends on your Time of Useful Consciousness (TUC), which essentially equates to how long you have before you enter the land of the unknown. In a nutshell, your body has a certain amount of time (TUC) to recognize the symptoms of hypoxia and react before your good judgment takes a dive.

Your Susceptibility to Hypoxia is Unique to YOU

The symptoms of hypoxia present themselves differently in each person. A Captain flying for a major airline may experience a reduction in night vision while her First Officer is turning blue. But even though the severity of the symptoms may differ, both pilots are operating with less than a full tank (of oxygen, that is), predisposing them to a continued degradation in piloting skills.

Mental and physical fatigue, alcohol consumption, smoking and being physically out of shape increase your susceptibility to hypoxia.

Your tolerance to hypoxia also depends on external factors. Are you already acclimated to higher altitudes because you routinely fly from an airport with an elevation of 5,000 feet? If so, you may be better able to combat the effects of hypoxia.

Rapid rates of ascent, cold ambient temperatures and the time you spend at the altitude can all decrease your tolerance.

Gaining an Appreciation for Hypoxia

Many will never experience flight at high altitudes in unpressurized conditions. But the geographic location of some flight training facilities, like Upper Limit Aviation, can actually help you acclimate to higher altitudes. If you’re lucky enough to actually fly in the mountains or experience actual hypoxia in a high-altitude chamber, then you’re probably one step closer to recognizing the symptoms, which may just save your life someday.

Awareness is key. Just as knowing your strengths and weaknesses as a pilot help you focus on mastering new skills, so will learning how you react to hypoxia and limiting the factors that exacerbate the condition.

If you find yourself suspecting hypoxia and you are able, descend immediately and declare an emergency. Breathing supplemental oxygen at the required altitudes may also mitigate your chances of developing hypoxia.

Take the plunge (or rather the ascent) in an actual altitude chamber!

For free (yes, that’s right), you can visit and “fly” in an altitude chamber to gain a better understanding of hypoxia, the symptoms of hypoxia, rapid decompression and high altitude flying. The FAA has a chamber in Oklahoma City at the Mike Monroney Aeronautical Center.

Flying a pressurized aircraft and monitoring your O2 level may also help. Or if you were planning to buy an airplane anyway, consider one (like the Piper PA-46 M350) with a built in system that not only measures your level of oxygen saturation (yes, a pulse oximeter and carbon monoxide detectors are built into the panel) but also initiates a descent when a lack of pressurization occurs and pilots fail to respond.

Whatever option you choose, avoiding conditions favorable for hypoxia may lead to many more flights. And after all, isn’t that the ultimate goal?

Happy Flying!

Get Started With Your Flight Training Today

You can get started today by filling out our online application. If you would like more information, you can call us at (844) 435-9338, or click here to start a live chat with us.

References:

National Transportation Safety Board. (2001). 2001 GA Accident Aircraft Data Used in Annual Review. Retrieved from http://www.ntsb.gov/investigations/data/Pages/aviation_stats.aspx

Reinhart, R.O. (2008). Basic Flight Physiology. New York, New York: McGraw Hill.

Sport Pilot Training: Everything You Need to Know

John Peltier

Want to fly around for simple travel and sightseeing but don’t have the resources to obtain a private pilot’s license? Or perhaps you can’t get the medical certificate for your private pilot but can still safely operate an aircraft. Go through sport pilot training instead!

What Can You Do as a Sport Pilot

The sport pilot rating can be very confusing to many people, even current pilots and flight instructors. It’s that “in-between” area between flying ultralights and being a full-blown private pilot.

A sport pilot can fly any aircraft categorized as a “light sport” aircraft. These aircraft weigh less than 1,320 pounds, cannot cruise faster than 120 knots, and only have seating for one passenger in addition to the pilot. There are a few other technical requirements, but these are the basics to be considered a light-sport aircraft. Examples of light-sport aircraft include the popular & timeless J-2 Cub, Aeronca Champ, the newer Cessna Skycatcher, certain gyroplanes, balloons, and gliders.

As a sport pilot, you can use your driver’s license to fly you and a friend around uncontrolled airspace during the day, under 10,000’, and in visibility greater than three miles.

Additional endorsements are available for sport pilots to be allowed to fly in certain controlled airspace and in varying light-sport aircraft.

Eligibility Requirements for Sport Pilot Training

In order to start your sport pilot training, you must have at least a valid U.S. driver’s license. Except if you’re training to fly gliders or balloons – no driver’s license is required. If you’re using a driver’s license, you’ll need to comply with any restrictions issued under this license, such as the requirement to wear corrective lenses.

You may most certainly use an FAA medical certificate instead of a driver’s license, but be careful if you don’t yet have a medical certificate and try to get one. If you apply for a medical certificate but are found ineligible for one, this will disqualify you from getting your sport pilot license. If there is any doubt about your ability to pass an FAA Third Class medical, you may just want to use your driver’s license, so long as you can safely operate an aircraft.

You need to be able to read, write, and understand English.

You’ll need to have reached your 17th birthday when you test for your sport pilot license in anything other than a glider, in which case you only need to be 16 years old. You can start training when you’re 14 for gliders, and 16 for all other aircraft.

Before you can take your practical test you’ll need to take a written knowledge test.

After a certain amount of flight training (20 hours in airplanes & gyroplanes, 10 hours in gliders) you’ll be eligible to take the final practical test with an FAA examiner.

What to Expect in Sport Pilot Training

Sport pilots still need to know the basic “rules of the road” in order to safely operate an aircraft in American skies. Your sport pilot training will start with ground instruction on some of these subjects. Some of the sport pilot ground training subjects include:

  • The FAA regulations applicable to sport pilot privileges and operations
  • Visual navigation using aeronautical charts
  • Basic weather theory as it applies to aviation
  • Understanding of aircraft systems
  • Aeronautical decision making

With the right attitude, you’ll be able to hang out in the pilot’s lounge in airports across the country and participate in discussions about these subjects! Not to mention being able to safely and effectively operate your aircraft.

You’ll also be getting up in the air for some flight instruction concurrent with most of your ground training. Depending on which aircraft category you want to get certified in, and how fast you pick things up, this could be anywhere from ten to twenty lessons.

In airplanes, for example, you’ll need a total of 20 hours flight time (half of what is required to be a private pilot). This is broken down into 15 hours of flight lessons with a flight instructor and 5 hours of solo flight.

Your first few lessons will be all about familiarizing yourself with the airplane – preflight, controls, and postflight. Once you have a foundation of these things, then your instructor will take you through basic maneuvers during your next few lessons. These topics will include takeoff, maneuvering with reference to objects on the ground, and landing. You may even get surprised with an emergency procedure or two.

At that point, you should be ready to solo! Your first solo will be limited to flying around the airport, but after that you’ll be on your own “cross-country”! This solo cross-country flight must be a minimum of 75 miles. During these 75 miles, you’ll be making a landing at a second airport other than your home base, and have one segment of the cross-country longer than 25 miles. It’s an awesome feeling!

Other airplane requirements are a total of ten takeoffs and landings to a full stop and two hours of cross-country flight training with an instructor (you’ll do this before your cross-country solo).

Once you’ve completed all of the above sport pilot training you’ll be ready for your practical test, so long as you’ve already taken your knowledge test. The knowledge test is a written test at an FAA testing center with questions related to what you learned during your ground training.

The practical test, also known as the “checkride”, is with an FAA examiner. He or she will quiz you orally before your flight on those subjects you learned in ground training, then you’ll go on out for your flight! Just imagine that it’s just another flight with your instructor. The examiner will want to see you preflight the aircraft, crank it up, takeoff, perform some basic flight maneuvers, stalls, an emergency procedure, then come back and land. That’s all there is to it! You’re now a certified sport pilot!

Restrictions on Sport Pilots You Need to Know

Some of the basic restrictions have already been outlined, like airspeed limits and altitude limits.

You also cannot operate in any controlled airspace as a basic sport pilot. That is to say, around small airports with control towers or in airspace around larger airports like Los Angeles. However – there is a provision to allow sport pilots to fly in this airspace. All it takes is some extra training and an endorsement from an instructor. You’ll learn more about using the radios, navigation, controlled airport operations, and the FAA regulations as they relate to controlled airspace.

This endorsement is really not difficult to obtain and it really opens up your options for flying!

There are many other restrictions outlined in the Federal Aviation Regulations (Part 61.315 if you’re interested). Here are some highlights from the long list:

  • You can only fly one passenger, and you may split operating costs evenly among the two of you (your passenger cannot pay more than an equal share)
  • You cannot fly to further your own business
  • You cannot fly at night
  • You cannot fly greater than 2,000 feet above the ground
Should You Pursue Sport Pilot Training?

If you want to experience the freedom of flight but can’t make the commitment for private pilot training, then absolutely go for it! Just realize that while it’s a fast-track to being a pilot, flying is a very serious business with risks. Treat is as such and you’ll be glad you did!

Get Started With Your Flight Training Today

You can get started today by filling out our online application. If you would like more information, you can call us at (844) 435-9338, or click here to start a live chat with us.

Featured Image by Chris Happel

The Cessna Training Program: Flight Training the Cessna Way

Shawn Arena

So you have decided to not only begin flight training, but have focused on using Cessna aircraft and their associated Training Program. First a caveat – regardless of the type of aircraft and program selected, the main goal is training you safely, efficiently, (and as in this case) the use of a specific aircraft manufacturer’s best-recommended practices.

A Few Basics on Cessna Training Aircraft

Cessna utilizes two primary basic trainers for their Cessna flight training program: The 152 (C-152) and 172 (C-172). The main differences between these two are not only the number of seats (2-152 vs. 4-172) but engine horsepower (110hp-152 vs. 150hp-172). Training can be conducted in both, however usually the smaller 152 is used for most of the basic training and then the 172 after flying skills have matured to a safe and comfortable level per the individual flight instructor. Cessna flight training aircraft are high-wing, very stable aircraft that provide an excellent platform to learn and master the necessary flying skills.

The Cessna Flight Training Program

The Cessna Flight Training Curriculum is very comprehensive, logical, and easy to master. The Program is segmented into three areas: Pre-Solo, Solo and Cross Country, and Preparing for the Flight Test. In the initial phase of Pre-Solo, the student is indoctrinated into the nuances and ‘feel’ of the aircraft itself, expectations and milestones to achieve, and finally alignment towards solo flight.

The second Phase, Solo and Cross Country, starts with that indelible achievement of your first solo and builds on the skills, airmanship and expanded aeronautical knowledge so as to conduct a flight safely and efficiently outside of the confines of your home airport.

The third and final stage is preparing for the Flight Test to be administered by an FAA Designated Examiner. They will ultimately determine and present to you your “License to Learn” (as some call the Private Pilot certificate) or in some cases, the Sport Pilot License.

Flight and Ground Training Concentrations of the Cessna Training Program

Since all flight activity is conducted in three-dimensional space versus the two-dimensional ground experiences we are accustomed to, a core feature of the Cessna Training Program is to focus on the following:

  • Real-World Training
  • Risk Management for Pilots
  • Assessment

Real-world training is introduced to demonstrate what you may/will encounter during your flying experiences and how to strengthen your decision-making skills. Specifically, instructors want to see how you perform in pre-flight, automation utilization, and navigational operations. Risk Management for Pilots focus on the acknowledgment that flight is a constant assessment of risks and recognizing how those risks are managed and mitigated. Finally, the Assessment stage develops an inner-focus from the pilot’s perspective and an objective view as seen from the Instructor. All three of these phases work synergistically and cover such areas as in-flight emergencies, aviation weather, operations in and out of large-towered airports, small non-towered facilities and the associated airspace with both types of airports.

Stick-And-Rudder Skill Development and Closing Comments

Like in all new endeavors, flight training is an acquired learning of components such as ground maneuvering, takeoff and cruise, en-route flight, and finally descent and landing. Within all those phases you will learn how to safely conduct straight and level flight, stall recognition and recovery, steep turns, slow flight, emergency recognition and mitigation and unusual flight recovery.

All of those areas require separate stages in training that not only build confidence but mastery of basic aeronautical stick-and-rudder skills that will be required for safe travel in flight conditions.

In closing, the Cessna Training Program is built on solid information, and will allow you to confidently utilize aerial navigation skills that you will be proud and eager to display!

Get Started With Your Flight Training Today

You can get started today by filling out our online application. If you would like more information, you can call us at (844) 435-9338, or click here to start a live chat with us.

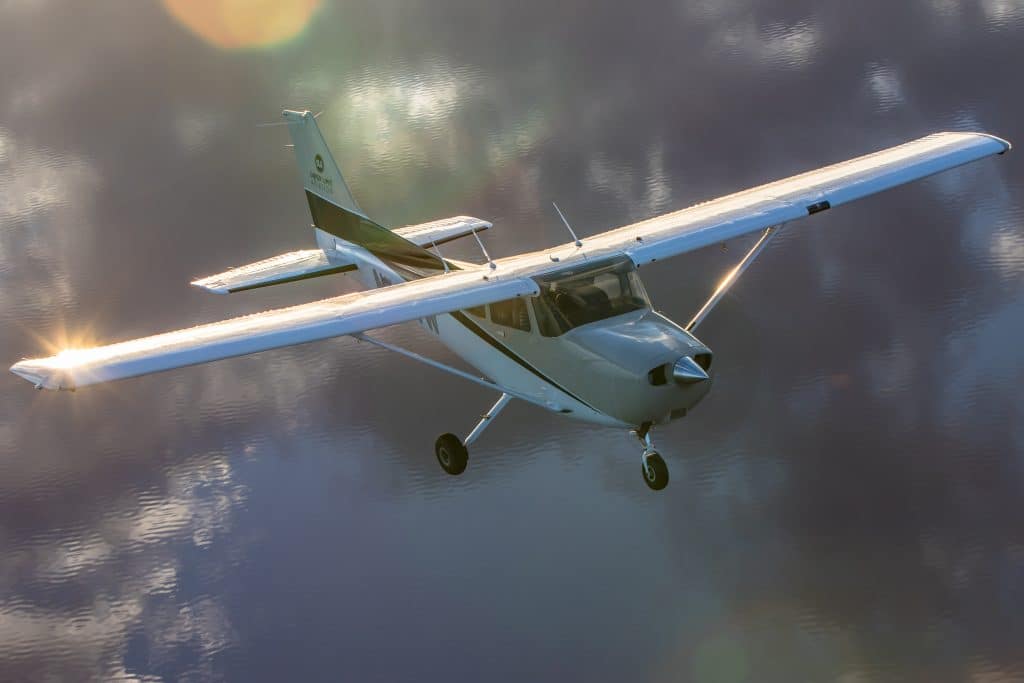
Cessna Flight Training: Why Flight Schools Love Cessnas

Jennifer Roth

It may seem odd and almost archaic these days that most initial flight training is done in a small aircraft like a single engine Cessna. Many times, students show up to tour a flight campus and they are often surprised at how small and “simple” the airplanes look. This, however, is an opinion that usually changes once they begin their flight training.

Cessna airplanes are excellent for flight training because they are able to handle the constant stress that training puts on them. Student pilots are able to make mistakes and learn from them during Cessna flight training without putting themselves in danger every time. The airplane is stable, yet controllable, allowing for a wide range of maneuvers to be practiced. Cessnas are also very cost efficient aircraft, not only for the student but also for the flight schools or training facilities using them. The aircraft tend to be smaller when used in the training environment, usually two to four seats. Although it may be smaller space wise, it is enough to allow for a student and flight instructor as well as all the available information for the teaching and learning environment (“Planes You Can Fly”, n.d.).

cess1

Cost efficiency and easier maneuvering are not the only reasons flight schools tend to utilize Cessnas for training, but also the vast amount of information that can be learned within one. When a person decides they want to start flying, usually the less aviation knowledgeable person assumes they will start off in a “jet.” In reality, that is just not possible, and with today’s ever-growing and changing technology, it is hard to grasp flying something like a Cessna. Many Cessna aircraft have older avionics, or “steam gauge” instrument panels.

And for prospective student pilots, this may seem like the “old” way to fly as opposed to the glass-paneled aircraft that are becoming more popular. Learning through these older instruments can sometimes help build a solid foundation of instrument interpretation, and with this knowledge, a student can apply it to more advanced systems such as a Cessna fitted with Garmin G-1000. However, starting out learning in a glass cockpit can also offer benefits to students, and Cessna has multiple types of aircraft allowing for a wide range of flying, depending on the level of learning being sought.

Once a student has completed their flight training, if they choose to continue toward a career in the airlines, they are able to take the knowledge they learned flying a Cessna aircraft and apply it to any aircraft they fly. Of course, like with anything, there will be new training to learn whatever specific aircraft they will fly, but they will have that solid foundation of knowledge. That groundwork will allow them to specifically focus on learning the aircraft rather than having to relearn to fly.

So, to some, the smaller aircraft such as Cessna may seem small in size, but Cessna flight training will teach a person everything they need to know about flying, and they will have fun in the process!

Get Started With Your Flight Training Today

You can get started today by filling out our online application. If you would like more information, you can call us at (844) 435-9338, or click here to start a live chat with us.

The Questions to Ask When Choosing a Flight School

Early in childhood, most of us were taught these basic types of questions and how to apply them in any given situation. When it comes to choosing a flight school, these old friends will not lead you astray. Selecting where to do your pilot training is a serious endeavor that can be tedious, confusing, and often overwhelming. My goal, however, is that you walk away from this article feeling a bit more prepared when taking the first steps toward your next aviation adventure, whatever and whenever that may be.

Choosing a Flight School: The Who

Do your best to meet several flight instructors, including those who would likely be assigned to you. If the Chief Instructor Pilot is available to discuss their programs, that’s even better. Try to speak with some of the office staff and aircraft maintainers, as well. Talk to them about their backgrounds, ask all your questions, and don’t be afraid to get their opinion on the company and training programs. You would be surprised the kinds of insight people will offer when given the opportunity.

Choosing a Flight School: The What

A Cessna 172 Skyhawk in flight.

Take a good look at the aircraft you’ll be flying, as well as the number of aircraft available versus the number flown on a daily basis. Having twenty aircraft means very little if only three of them are airworthy, and should be looked at as a red flag. Inside the aircraft of today’s schools, the systems and equipment can vary greatly. Do the majority of aircraft have glass cockpits or steam gauges? Dual GPS or a single VOR? Are you looking to be trained only in aircraft with new digital, glass cockpits? The options will be many, so have an idea of your equipment desires before you venture out.

Choosing a Flight School: The When

A student’s pace in training can largely be determined by availability, both on the part of the instructor and the student. Ask about CFI-to-Student ratios, and be honest with yourself about your own availability. Perhaps your planned schedule only allows for early morning flights on the weekends, which the school may or may not be able to support. These will be some of the factors that determine your expectations for the pace at which you complete training. Be justifiably leery of any school whose main attraction is a shortest-time-to-ratings mantra; effective instruction will be inherently efficient and should establish a reasonable pace unique to every student.

Choosing a Flight School: The Where

Is the airport in a remote location? Is it near an International Airport? Is it based at an International Airport? Are there other flight schools at the same airport, adding to the daily traffic density? How will those factors affect your training and do they align with your desires as a student pilot? Some students seek the structure and added rigor of Class Bravo airspace, while others may want the quiet radios of a small, hometown airstrip. Ask to see the briefing rooms where you’ll do ground training, as well as maintenance spaces and administrative offices. You’ll be spending a good amount of time, and money, so get to know the facilities.

Choosing a Flight School: The Why

One of the most efficient questions you can ask a prospective school is “Why should I choose your flight school over every other flight school?” This is where doing your homework and visiting multiple schools if your local area affords it, can really pay dividends. No flight school should be shy about answering this question. In fact, one would hope to hear a prideful undertone in their response.

Choosing a Flight School: The Howchoosing a flight school

The final two questions are a culmination of everything we have discussed. Often times the first and most decisiveaspect of flight training is “How much will it cost?” A valid concern considering the cost of present day flight training. Get specifics in writing for aircraft (including variously equipped), instructors, ground school, written exam and checkride fees, required vs. desired training supplies, security badge fees, and any other school-specific costs. This will be one of the best ways to compare apples-to-apples between various locations.

The last question, and in my opinion far and away the most important: How did you feel? Every flight school is different, from the people to the aircraft to the fabric on the chairs in the lobby. It is of the utmost importance that you not only feel comfortable and safe in the environment but that you get a deeper, internal sense of “this is the right place for me”. I would offer the flight school should feel the same way. They should be accepting of and forthcoming regarding your questions and supportive of you choosing what best suits you and your goals as a pilot. If they aren’t, how does that make you feel?

Get Started With Your Flight Training Today

You can get started today by filling out our online application. If you would like more information, you can call us at (844) 435-9338, or click here to start a live chat with us.

Accelerated Flight Training Versus Regular Flight Training

Dr. Mary Ann O’Grady

When considering enrollment in a flight training facility that offers “accelerated flight training” courses that allow you to earn your private pilot’s license or other ratings, such as instrument, commercial or CFI/CFII (flight instructor) within a reduced timeframe [seemingly] in an attempt to save you time and money, reflect upon these questions:

How do accelerated flight training programs compare and contrast with regular flight training programs?

How does the quality of the education compare/contrast between accelerated flight training schools and regular flight training schools?

Do you have what it takes to attend accelerated flight training schools and successfully complete an accelerated flight training program to get your “ticket”?

Accelerated Flight TrainingThe definition of accelerated flight training in comparison to regular flight training suggests that a flight student will be able to complete any one of the pilot training programs within a reduced time frame while still adhering to the number of hours required by the FAA at every one of their FAA certified flight schools. For example, the private pilot license requires a minimum of 40 hours according to parts 61 and 91 of the FARs. This includes 20 hours of “dual” flying with an instructor, 10 hours of “solo” flight time when you will be practicing preflight procedures, airport operations, takeoffs and landings, navigation, flight at various airspeeds, stalls, night operation, and emergency operations. You will also need three hours dual cross-country flying with a destination in excess of 50 miles from their origin, three hours of dual night flying, and three hours of dual flying by instruments only. Your solo flight time includes a minimum of five hours on cross-country flights during which one trip must cover a minimum of 150 miles with landings at three airports.

The aeronautical knowledge required by the FAA in the FARs in addition to the time spent developing your flying skills in the air, includes aerodynamics, aircraft systems, aeronautical decision-making, weather reports and forecasts, planning for the unexpected, aircraft performance, and various methods of navigation that is often dictated by what avionics are available in the flight school’s aircraft as well as what nav aids are located on the airports where you are flying. My suggestion is to take advantage of everything that is available to you rather than developing a penchant for a particular nav aid that may or may not be available to you in the case of an emergency or due to other unforeseen circumstances.

In addition to the ground (classroom) and flight (in the air) training, it is necessary for you to demonstrate your mastery of both the theoretical and practical application of the material by taking and passing a written, oral, and practical flight test with an FAA examiner. Although you must pass the written test by taking advantage of any number of study guides that are available, I caution you that passing the written test alone will not make you a safe and competent pilot. Your flight instructor will guide you in what areas to study as well as where you will find the most up-to-date information which is the ideal way to spend those times when you have IFR conditions and you are working towards becoming a VFR pilot. As one honest flight instructor succinctly told his advanced aviation students: “Yes, I can teach the ATP ground school for taking the written ATP exam in three days, but you will never retain the information.”

If you are considering enrolling in accelerated flight training schools with an accelerated program, be sure to reflect upon whether that program will provide the same quality of instruction that a regular or non-accelerated flight training program does. It is wise to consider the level of flight training or rating that you wish to pursue at this point because they require varying levels of expertise to successfully complete. For example, if you are just entering your initial private pilot training program which will serve as the foundation for all the rest of the ratings that you may decide to pursue, you might want to ensure that it is at the highest level of ground school and practical (in the air) experience. This will maximize your learning of the course materials and developing your skills as PIC (pilot in command). Typically it is better to learn a skill correctly the first time than it is to have to unlearn it and then develop that skill correctly. Perhaps the major consideration when making the decision regarding an accelerated flight training program is whether or not you personally have the temperament and capability to successfully complete such a program to get your “ticket”?

Not every student functions equally as well in a high-stress environment which is usually exacerbated by an accelerated flight training program. In addition, flying has sometimes been described as “hours of boredom occasionally punctuated by several minutes of pure panic.” This is not meant to discourage your decision regarding accelerated flight training schools and accelerated programs. However, when you have flown for thousands of hours, you are bound to encounter challenging situations, such as non-functioning radios, a deterioration in the weather, a malfunctioning flap switch, etc. So, developing confidence in your abilities as a PIC becomes a prime directive where you must be able to make a decision based on the information that you have available to you at that point in time and then stick with it whether you like it or not.

There is one accelerated flight training program that is being advertised on the Internet which purports to be the “fastest, safest and most affordable path to the sky” and that you can “learn to fly as little as 10 days or less” with their accelerated flight training program. They also promise to focus on teaching “in a relaxed, laid back environment.”  One thing that is immediately evident with this program is the lack of the student-centered ideology, and instead a focus on the philosophy, talent, skills, and goals of the owner/CEO.  There is little or no reference to tailoring their instruction to maximize student learning potential and a successful completion of the program.

Accelerated Flight Training

And also keep in mind, the indication of an excellent flight instructor is his or her ability to instill those skills and information in his or her students.

Get Started With Your Flight Training Today

You can get started today by filling out our online application. If you would like more information, you can call us at (844) 435-9338, or click here to start a live chat with us.

6 Must Read Tips for Your First Airplane Flying Lessons

Spencer Martin

Your first few airplane flying lessons are some of the most important and memorable you’ll ever have. Here’s how to make the most of your pre-solo airplane flight training.

Get Your Hands on the Controls

You learned to walk by walking. You learned to drive by driving, and flying is no different. It takes hours upon hours of hands-on experience to learn how to fly safely, so don’t let your flight instructor hog the yoke. It can be very helpful to have something demonstrated to you before trying it yourself; in fact, good instruction will require demonstrations. However, one example is usually enough and then it’s your turn to fly again. Even when your instructor is flying, you should follow along with them on the controls to feel how they are maneuvering the aircraft. This builds positive muscle memory and leads to good habits early on. It helps to know what type of learner you are too. Some people like more demonstration than others, but the point is to learn how to fly an aircraft by yourself so the more stick and rudder time you get, the better off you’ll be.

Keep Your Eyes Outside
View from the cockpit of a small plane - Airplane Flying Lessons

Photo by: ravas51

You are training to become a pilot under Visual Flight Rules (VFR). This means that the majority of your time should be spent looking outside and not at the flight instruments. Younger students who grew up looking at screens and digital distractions tend to rely on their instruments too much early on in their training. There is no need to depend on the artificial horizon on your attitude indicator when you have the real horizon right out your windshield. While flight instruments can be very helpful, they are to be used primarily to validate what you see outside. In fact, the FAA recommends “90% of the time, the pilot’s attention should be outside the cockpit.”1 Keeping your eyes outside not only increases safety for everyone in the air, it also leads to better piloting skills all throughout any course of training you set your sights on later. Plus the view is just the best!

Ask a Million Questions

At this point in the game, almost everything is going to be new, so try and absorb as much of it as you can without feeling like you’re drinking from a fire hose. Your CFI will love how engaged you are in your own learning and do everything they can to answer your questions in ways that make sense to somebody new to the complex world of aviation. If the lesson is focused on landings, try and come prepared with a few questions on power settings and airspeeds. If you’re learning about stalls, read the appropriate chapter in your textbook the night before the lesson and take notes on what you don’t yet understand. The more prepared and knowledgeable you are before a flight, the more you will take away from your time in the air. This leads to less repeated lessons and better overall comprehension of aviation and flying technique.

Questions, comments, complaints, concerns?

This is what my initial CFI would ask me every time we got back to his office after a flight to start a debrief. Getting a thorough debrief from your CFI is vital to retaining what you did right, and examining what can be improved upon for next time. Take notes and actively participate with your CFI to get the most out of their critique. Instructors want you to succeed just as much as you do; working closely with them and taking their suggestions seriously will help you become the best pilot you can be.

Become an Armchair Captain

A student pilot in the cockpit - Airplane Flying Lessons

It sounds silly but similar to flight simulator training, chair flying will save you so much time and effort in the long run. Ask any professional athlete how they practice and they will almost all tell you they practice with the same focus they have in the game. Practice only makes perfect if the practice is perfect. Do yourself a huge favor and practice checklist usage, stall recovery procedures, or radio calls on the ground where it is a low-stress environment (and where its free too).

Have Fun with Your Airplane Flying Lessons!

If you get stuck in a rut knocking out lesson after lesson, go for your first $100 hamburger or fly over your house or the nearest scenic landmark (at a safe altitude of course). Training can be stressful at times so it’s perfectly acceptable to do something with your CFI that will be memorable and remind you why you wanted to become a pilot in the first place.

In Conclusion

When everything is new and exciting, your first airplane flying lessons can fly by without you realizing it (pun intended). If you come prepared, are open to new experiences, and take charge of your own learning, then you’ll be enroute to becoming a private pilot in no time.

Get Started With Your Flight Training Today

You can get started today by filling out our online application. If you would like more information, you can call us at (844) 435-9338, or click here to start a live chat with us.

Sources:

1 – FAA-H-8083-3A Airplane Flying Handbook Figure 3-2

Mixing Airplanes and Helicopters: Safe VFR Airport Operations in Class G

Wilson Gilliam, Jr.

A small, white helicopter floats across the sky, practicing different types of approaches to the Class G airport in Virginia. The student pilot pulls the red trigger switch on the cyclic, still timid with inexperience.

November 2045 Romeo turning right base, 28, Hampton Roads Airport.

The pilot of an incoming twin engine airplane, hearing the first radio call and unfamiliar with the area, maneuvers into a right-hand traffic pattern for the same runway a few moments later. The pilot is late to a meeting and still has to grab a rental car.

November 8077 Papa entering a right downwind, Runway 28, Hampton Roads.

UNICOM quickly pipes up over the CTAF (Common Traffic Advisory Frequency).

November 8077 Papa, this is Hampton Roads UNICOM. We have a right-hand traffic pattern for helicopters only. Fixed-wing aircraft are to use a standard traffic pattern.

These types of radio exchanges are sometimes followed by a few choice words that are broadcast to the public thanks to tense hands and inadvertently open mics. Airplanes and helicopters are both ingenious marvels of the modern world, but inherently possess different flying characteristics. These variations must be planned for, especially at airports without an operating control tower, in order to maximize safety and efficiency.

A small single engine airplane by a hangar - Mixing Airplanes and Helicopters: Safe Airport Operations

I have flown both airplanes and helicopters commercially for twenty-five years. I’ve seen my fair share of helicopter versus airplane arguments, near collisions and foot races across the ramp to prove the point in person (you should plan on being out of the aircraft by the time the other pilot gets there). Can’t we all just get along? Yes, we can.

The Federal Aviation Administration (FAA) has provided pilots with general rules pertaining to operations within Class G (uncontrolled) airspace. The FAA has a strong commitment to safety and is a regulatory agency. So, let’s use their position on the matter as a starting point for this discussion about airplanes and helicopters sharing the skies at uncontrolled airports.

The FAA’s 14 CFR (Code of Federal Regulations) Part 91 (General Operating and Flight Rules) states:

  • 91.126 Operating on or in the vicinity of an airport in Class G airspace.
    • (a) General. Unless otherwise authorized or required, each person operating an aircraft on or in the vicinity of an airport in a Class G airspace area must comply with the requirements of this section.
    • (b) Direction of turns. When approaching to land at an airport without an operating control tower in Class G airspace—
  • (1) Each pilot of an airplane must make all turns of that airplane to the left unless the airport displays approved light signals or visual markings indicating that turns should be made to the right, in which case the pilot must make all turns to the right; and
  • (2) Each pilot of a helicopter or a powered parachute must avoid the flow of fixed-wing aircraft.

Note that 14 CFR 91.126 (2) does not specifically indicate “how” the helicopter should avoid the flow of fixed-wing traffic. This provides helicopter pilots with some flexibility while remaining compliant.

Tips for Airplanes and Helicopters Sharing the Skies

Here are a few tips for helicopter pilots at Class G airports, with 91.126(2) in mind. Remember that communication and avoidance are key elements in successful coexistence with fixed-wing aircraft.

  • Familiarize yourself with the Airport Facility Directory (AFD) prior to making your trip.

Note any instructions regarding helicopter operations, non-standard fixed-wing traffic instructions, taxiway diagrams, FBO location(s) and any nearby obstacles.

  • Listen to AWOS, ASOS or other advisory service.

Note the wind direction and any special instructions regarding landing information for helicopters. If the wind is different than forecast, don’t be afraid to change FBOs (or other landing areas) if the decision safely creates less interference with other airport users.

  • Request an airport advisory approximately ten miles away.

Hampton Roads traffic, November 2045 Romeo, small white helicopter, 700’ 10 miles north, airport advisory, please.

Adjust altitude to preclude interference with airplane traffic pattern altitudes. Note any possible traffic conflicts and turn your landing light on. Be sure to use the terms “copter” or “helicopter” during all radio transmissions to avoid confusion over aircraft type. If you have questions about acceptable landing areas, ask UNICOM (if available).

  • Your approach path must avoid landing airplanes.

Hampton Roads traffic, copter 45 Romeo, one mile north, will make approach to taxiway Charlie, remaining north of runway 28.

A helicopter in flight - Mixing Airplanes and Helicopters: Safe Airport Operations

The slower approach speeds of helicopters make them especially vulnerable to being overrun. Utilize an approach path well clear of airplane traffic and plan on landing in an area that minimizes rotor wash to parked or taxiing fixed-wing. Be very specific during traffic updates regarding your approach path relative to the active runway. Acknowledge nearby traffic to help alleviate collision concerns. Don’t forget to look out for other helicopters, too.

I have found it usually best to plan the helicopter approach directly to my final destination at the airport. This permits efficiency for paying customers, while minimizing the impact of my operations across the airfield.

Remember that helicopter pilots are taxpayers, too. As long as helicopters are not impeding the flow of airplane traffic established in the pattern for the “purposes of landing,” helicopters have a right to use the normally smooth, wide runway surface. Sometimes, this is preferred when practicing run on landings or full touchdown autorotations from altitude. Fixed-wing airplanes waiting on the taxiway for take-off do not have the right of way over a helicopter on final approach or on the runway. FAR 91.113(g) clearly indicates that:

  • g) Landing. Aircraft, while on final approach to land or while landing, have the right-of-way over other aircraft in flight or operating on the surface…

Airplane pilots waiting for departure should comply with 91.113(g) and not incorrectly invoke 91.126(2) to try and force helicopters off of the active runway. Helicopter pilots should clear the active runway as soon as safely possible.

  • If it’s necessary to cross a runway after completing the approach, utilize sound runway incursion avoidance techniques.

Remain clear of any hold short lines for the runway while making a radio call prior to crossing. Avoid radio transmissions while crossing since this does not allow for possible warnings via radio prior to runway encroachment. Position your helicopter so that rotor wash does not create turbulence on the runway (note wind and traffic conditions). If there is a passenger or second pilot, confirm tail rotor clearance during pedal turns and that the runway is clear prior to crossing.

  • Use care during hover taxiing.

Hovering helicopters can make ground bound airplanes dance in the wind, pelting them with loose debris. Believe me; this does not foster warm and fuzzy feelings between swing-wing and fixed-wing.

Be careful not to taxi behind large airplanes performing engine run ups (or any condition requiring thrust). These situations can create possible loss of tail rotor effectiveness (LTE) or hitting cyclic control stops.

  • Use caution if operating near self-serve fuel pumps.

Helicopters landing and taking off near fuel facilities have substantial potential for creating conflict. Be aware of your rotor wash. If in doubt, land nearby, throttle down and wait for a safe opportunity to use that credit card. Pilots of smaller helicopters may be able to land a short distance away and push the aircraft to the pump with ground handling wheels. That’s a better option than making airplane drivers so upset that you can’t even sit at the restaurant lunch table. If it does happen by accident, buy your fellow pilot lunch. A nice lunch. Steak if they have it. Remember, as in life – your reputation follows you around.

  • If operating at the airport on a routine basis, sit down with the facility manager and develop a plan.

Helicopter on a runway, with an airplane - Mixing Airplanes and Helicopters: Safe Airport Operations

Meeting with the airport manager about routine helicopter operations is some of the best advice I can offer. Creating well-developed helicopter operating procedures for the airport will enhance overall safety and enjoyment. Discuss traffic patterns, reasonable landing sites based on wind and traffic conditions and recommend that other helicopter operators abide by the same guidelines. Encourage airport management to distribute helicopter recommendations via updates to the AWOS/ASOS recording, AFD commentary and written dissemination among airport based rotorcraft operators. Helicopter flight schools should consider including the resulting operational plan as part of their standard operating procedures (SOPs) provided to employees, students and renters.

Remember, it’s a big sky with room for both airplanes and helicopters, but a small airport. Safety and communication are the keys to the facilities.

Get Started With Your Flight Training Today

You can get started today by filling out our online application. If you would like more information, you can call us at (844) 435-9338, or click here to start a live chat with us.

Sources:

14 CFR FAR Part 91

Smart Phones in Aviation: How Aviation Apps Affect Flying

Toni Mensching

Smartphones have only been on the scene for a little over twenty years. That’s less than the average person. Yet, smartphones have changed the world. Aviation’s changing resulting from smartphone capabilities and aviation apps is undeniable. For better or for worse, smartphones are in almost every pilot’s hand. How pilots use this resource varies with technological savvy. Flight planning, training, navigation, logbooks, and regulations are forever changed with the introduction of smartphones and aviation apps into the aviation industry.

Last year, my boss was standing in a group having an engaging conversation about a new product. The four of us were just outside a large hangar enjoying the cool breeze. His phone gave a buzz and he glanced up at the sky which was mostly obscured by the large hangar next to us. Though I saw no clouds, I followed when he said, “Let’s move inside to stay dry,” as he ushered us into the building. Less than two minutes later we could hear the rain pelting the rooftop of the metal hangar. He convinced them to try the new product. Me, however, he convinced to download the app which notified him that rain was imminent at his location.

Once, radar was only viewable on the local news or weather broadcast. Weather briefers and controllers with radar could only tell pilots what they saw. Now, with the touch of your hand, radar is immediately at your fingertips on the smartphone. Developers have created aviation apps that track rain’s radar return and notify you if rain is less than a few minutes from your GPS location. In aviation, thunderstorms can be extremely dangerous. Knowing where they are and where they are going improves safety beyond measure.

aviation appsComputerized flight planning came along before smartphones. No longer were pilots bound to using E6B calculators and plotters paired with weather reports to find out how long it would take to get from here to there. Computerized flight planning brought with it speed and convenience. Smartphones took this a step further making flight planning mobile and in some cases, seamlessly transferable to cockpit navigation equipment. Simply plan your flight on your phone, hop in your aircraft and Bluetooth will allow you to load that flight plan right into your GPS. No reprogramming necessary.

Smartphones have also begun to replace costly aircraft equipment in private aircraft. In the past, aircraft owners might have invested several thousand dollars on installing multiple receivers to be able to see things like weather and traffic in the cockpit. An iPhone, for instance, coupled with one mobile receiver now can display radar as well as aircraft operating nearby simultaneously. All this awareness information is overlaid onto a moving map of your route on your smartphone so you have the greatest amount of situational awareness possible.

For fear of low return on investment, aircraft owners have long lamented installing costly avionics equipment in an aircraft they may not plan to keep more than a few years. With the advent of smartphones making luxuries portable, more owners will choose to invest in equipping themselves with these awareness tools such as traffic and weather reporting systems. Increased situational awareness on an individual level improves overall industry safety.

Smartphones have also provided a way to ease the manual burden of completing logbook entries. When paired with an electronic logbook, a smartphone acts as an immediately available recording tool in the cockpit. Carrying a large logbook on several flights is not only cumbersome but doing so increases the risk of lost logs. That’s why some pilots carry smaller, pocket sized, crew logbooks along on multiple day trips. An extra crew log introduced a data transfer step into the already manual process of logging flight experience. The convenience of the smartphone helps pilots bypass the transfer, risk of loss, and cumbersome book shuffling by allowing electronic record entry in a device which is already a part of everyday life.

Smartphones have changed aviation by making flying a more social activity. Popular among today’s flight students, sharing training flights via social media is bringing pilots and their loved ones closer together. Families, friends, and spouses are taking an active and supportive role in flight training by using these tools. Therefore, bridging the once crippling gap between the aviation and non-aviation worlds. No longer does a flight student spend the day away training without any significant method to show or tell loved ones about the wonderful training experience. Now, friends and family might follow along via social media or experience a narrated playback of the recorded flight route as the pilot shares it.

aviation appsWhile most of these changes can be viewed as positive, in some ways smartphones have caused a decline in safety. Separating from the constant communications of a smartphone is necessary to maintain awareness during flight activities. Some find putting down these devices more challenging than expected. Display induced attention tunneling is one factor cited by the Federal Aviation Administration to justify new regulations restricting the use of smartphones by pilots when flying. Some also blame technology for complacency. Pilots must maintain redundancy to overcome the looming battery or hardware failure.

Overall, the positive aspects of smartphones and aviation apps far outweigh the drawbacks. Flight planning, weather reporting, traffic awareness, logbooks, flight training communities, and many other aspects of aviation greatly improved with the introduction of smartphones. When used properly, these devices make flying easier and safer.

Get Started With Your Flight Training Today

You can get started today by filling out our online application. If you would like more information, you can call us at (844) 435-9338, or click here to start a live chat with us.

The Differences Between Helicopter Flying and Airplane Flying

Margie O’Connor

When asked how helicopter flying is different from flying an airplane, my response has always been the same: it’s much more difficult to eat a sandwich while flying a helicopter, whereas, in a well-trimmed airplane, light finger pressure on the yoke is enough to hold the aircraft straight and level while eating a sandwich with the other.

Why is this? Well, helicopter flying, although an adrenalin mounting endeavor (and the one I prefer), requires the use of both hands simultaneously on the controls. Does this mandate a white-knuckle grip, through all phases of flight, to keep the helicopter flying? Quite the contrary. Helicopter pilots are typically taught to place their hands and feet on the controls and then simply “think” about flying the helicopter or applying very small, smooth movements via the flight controls. But both hands are still occupied.

Aerodynamic Forces

Helicopter and fixed-wing flying use the same aerodynamic principles – just applied in slightly different ways. Lift, weight, thrust and drag play a role in the movement of both aircraft.

Thrust must be greater than drag to cause forward movement in an airplane in flight. In helicopter flying, these same forces act as vectors to accommodate the condition of flight (i.e., left, right, up, down, etc.). For example, in forward helicopter flight, lift acts as the vertical component of the Total Aerodynamic Force (TAF) and drag takes up the position opposite and perpendicular to the TAF. Or using a different visual, lift makes up the vertical component of the total lift vector with thrust acting perpendicular and opposite to lift in the same vector – thrust either acting forward (in forward flight) or left, right or to the rear (in the corresponding direction).

In steady state, un-accelerated flight in an airplane, lift equals weight and thrust equals drag. In a hover (in a no wind condition) lift and thrust combine into one force and are equal to and act opposite the sum of weight and drag.

Airflow

While these same forces come into play in both helicopter and airplane flying, the airflow is slightly different. In an airplane, the air flow over the wing speeds up as the aircraft’s speed increases. Helicopter flying incorporates both the helicopter’s speed and the speed at which the rotor blades move through the air.

How do we manipulate all these forces? Well, in an airplane, the pilot uses the control yoke or column and rudder pedals. In helicopter flying, the collective, cyclic and antitorque pedals control the forces in flight.

Controlling the Forces

In helicopter flying, the pilot’s left hand controls the collective and sometimes a throttle, depending on the aircraft. The collective is a bar or stick, if you will, parallel to the floor of the helicopter, when in the down position. As the pilot lifts the collective, the corresponding change in the rotor blade’s pitch angle increases lift and thus helps “lift” the helicopter up. The collective controls the up and down of the entire helicopter.

The pilot’s right hand controls the cyclic, positioned between the pilot’s legs. The cyclic runs somewhat perpendicular to the floor of the helicopter and provides pitch and roll about the lateral and longitudinal axes, respectively. The cyclic essentially works by changing the tip path plane of the rotor allowing you to maneuver in directions impossible for the fixed-wing pilot. So, yes, you can actually fly backward (without help from an excessively strong headwind) or hover over a fixed location!

While collective and cyclic keep your hands busy, the antitorque pedals demand your feet participate, as well. In a single rotor system, like those found on many trainer helicopters, pushing on the right pedal, turns the helicopter to the right while pressure on the left pedal, rotates the aircraft left. But that’s not the primary function of these two pedals on the floor. Their main purpose in life is not to add yet another required movement to flying a helicopter but rather to counteract torque.

Torque is the force that causes rotation and is countering the main rotation of the rotor blades. In aircraft flown in the United States, rotor blades rotate counter-clockwise, as viewed from above the rotors. Based on Newton’s third law of motion, torque imparts the tendency for the nose of the helicopter to move right. Antitorque pedals exist then, to counter torque.

So there you have it. Flying helicopters differs from flying airplanes mainly in the controls you will use… and that it may be slightly more difficult to eat a sandwich. But I’m still partial to helicopter flying: there’s nothing quite as awesome as hovering.

Get Started With Your Flight Training Today

You can get started today by filling out our online application. If you would like more information, you can call us at (844) 435-9338, or click here to start a live chat with us.

References:

Center, U. S. (1996, July). Theory of Rotary Wing Flight. Fort Rucker, Alabama, United States of America.

Dole, C. E. (1994). Flight Theory for Pilots. Redlands: Jeppesen Sanderson.

Harp, P. (1996). Pilot’s Desk Reference for the UH-60 Helicopter. In P. Harp, Aerodynamics (pp. 6-18, 6-21, 6-32). Enterprise: Presentation’s Plus.

Michael J. Kroes, J. R. (1993). Aircraft Basic Science. Westerville: Glencoe Division of Macmillan/McGraw-Hill.

What to Expect When Earning Your Airplane Instrument Rating

John Peltier

Congratulations, you just got your private pilot airplane license. You want to use this newfound freedom to fly to the family cabin in the next state, but there won’t be any VFR weather between here and there for the next week. Grounded. But what if you had your airplane instrument rating?

Reasons for Getting Your Airplane Instrument Rating

Of course, being able to legally fly in IFR conditions isn’t the only reason for getting your airplane instrument rating. It shouldn’t even really be “the reason” for you to get your instrument rating. You always want to better yourself as a pilot, right? This is a great way of doing it.

There may come a day when you find yourself facing inevitable flight into IMC – the clouds close in around you and there’s nowhere else to go. Having your instrument rating will prepare you for inadvertent flight into IMC and give you the tools you need to safely recover from that dangerous situation.

Even if you don’t accidentally find yourself in IMC, your instrument rating will teach you an effective instrument scan, leading to better control of the airplane. You’ll be better able to hold altitude, airspeed, and heading. And guess what – these are things that potential employers will want out of you as well.

And speaking of employment. If you ever have any desire to fly commercially, most employers won’t even give you the time of day if you don’t have your airplane instrument rating along with your commercial license.

Airplane Instrument Rating Requirements

Getting your airplane instrument rating isn’t as hard as you might think. You may look at the regulations and say to yourself, “wow, that’s a lot, I’ll never get it.” Sure you will! It just looks like a lot on paper.

Summary of Federal Aviation Regulations Part 61, Subpart B, 61.65:

  • At least a private pilot certificate in airplanes, or are currently in the process of getting it.
  • Take a written test (knowledge test) and an oral & flight test with an examiner in either an airplane or FAA-approved simulator (practical test). Your logbook will need endorsements from an instructor stating that you’re ready for both of these.
  • The flight experience you’ll need for the airplane instrument rating is:
    • Forty hours of simulated or actual instrument flying, 15 of which must be with an authorized instrument-airplane instructor.
    • Fifty hours of cross-country flight as pilot-in-command. Ten of these hours must be in airplanes (you can credit helicopter time if you have it).
    • A 250-mile cross-country flight in an airplane, with an instructor, flown under instrument flight rules. You must complete at least three different kinds of instrument approaches and fly an instrument approach at each airport along your routing.
    • Three hours of flight training in an airplane within 2 calendar months from the date of your practical test.
  • The FAA now allows pilots to get their instrument ratings concurrently with the private pilot license. This will speed things up though you won’t have the 50 hours of pilot-in-command cross-country time. The FAA will allow you to credit up to 45 hours of you performing the duties of pilot-in-command (as you do when you’re a student pilot) in lieu of this.
  • If you’re using a simulator, as you most likely will, you can only credit up to 20 hours of instrument time towards your rating – you’ll have to fly the other 20 in an actual aircraft. If you’re getting your simulator time in a structured Part 142 school, you can credit up to 30 hours.
What to Expect

Ground Training: You’ll need a good understanding of academia for your knowledge and practical tests. The amount you spend in academics will vary but it typically runs around twenty hours in the classroom. You’ll learn even more about the national airspace system, regulations, instrumentation, and bringing it all together to fly under instrument flight rules. You’ll also become a near expert at reading the weather and planning cross-country flights. Paying attention in ground school will set you up to do very well during the practical test, which is taken at designated FAA testing centers around the country.

Simulator Training: You don’t have to use the simulator – you can complete your entire instrument rating in an actual airplane, but this will significantly drive the costs up. The other advantage to using the simulator is efficiency of training. Your instructor can replicate conditions in the simulator that you wouldn’t be able to call for in the air. It allows you more room to make mistakes and learn from them, and “start from scratch” if needed. The simulator is where you’ll learn a good scan, preflight instrument checks, communications, and instrument procedures. Exposure to these in the simulator will make them easier once you get to the airplane.

Flight Training: And this is where the real fun begins! You’ll sit in the right seat with a view-limiting device, affectionately known as “foggles”, restricting what you can see to only the instrument panel. You’ll put these on after takeoff and remove them prior to landing. But you’ll wear them for everything in between. Your instructor will have you do some very basic maneuvers like changing altitude, and some more complex ones like recovering from unusual attitudes. You’ll get exposure to different local airports, flying all of the possible instrument procedures that are compatible with your aircraft navigation equipment.

The Practical Test: This is where it all comes together! You and your instructor will go over your logbook to make sure all of your requirements are met and set up an appointment with the dedicated pilot examiner (DPE). The DPE will have you plan a cross-country flight under instrument flight rules, and it may or may not be what you actually fly. But the DPE will want to make sure that you can complete one of these without error. The day will start with an oral exam, and everything you’ve learned up to this point is fair game. The oral exam will vary in length depending on the examiner, but once they’re satisfied you’ll head on out to the airplane! The actual flight itself will be a lot like your instrument training flights. You’ll take off, put on the foggles, and fly under instrument flight rules. You’ll have to recover from an unusual attitude and have another emergency procedure thrown in the mix. After flying a few instrument approaches, you’ll take off the foggles and the exam is over!

Costs of Getting an Airplane Instrument Rating

It’s hard to nail down an actual cost of receiving your airplane instrument rating. There are many different variables to take into consideration – the equipment used, flight time needed, location, fuel prices, extra training required, etc.

A “standard” instrument rating, using a C172 with twenty hours of simulator time will run somewhere in the ballpark of $8,000. If you need extra cross-country time as pilot-in-command, expect these costs to go up.

A good way of reducing overall costs of getting to your goal of being a commercial pilot would be to combine your instrument rating with other requirements of commercial employment. You can satisfy the cross-country time required for your commercial license by taking an instructor or safety observer and flying with the foggles on these cross-country flights, logging this time for both instrument and commercial. You may also want to consider doing some of these flights in a complex aircraft, turbine, or multi-engine.

After Getting Your Airplane Instrument Rating

You can consider your airplane instrument rating as something that dies unless it’s used! You’ll need to stay current in order to legally fly under instrument flight rules. Staying current involves completing six instrument approaches, holding procedures, and instrument navigation within a six-month period. You can complete this in either an airplane or simulator, but you cannot fly under IFR unless these requirements are met.

But these are the minimum requirements to keep your rating current. In order to be a proficient IFR pilot, you actually need to fly in IMC. You need to use your instruments every time you fly, even in VMC. If you’re coming back to the airport on a perfect VFR day, dial in the localizer and shoot the instrument approach back home. It may save your life some day!

Get Started With Your Flight Training Today

You can get started today by filling out our online application. If you would like more information, you can call us at (844) 435-9338, or click here to start a live chat with us.

Call Us